TableView Cell에 ImageView 연결하기
⎮ Table View 세팅할 때의 오류 상황
1. ⌘ + Shilt + L 하여 TableView 추가

2. TableView에 Label 또는 ImageView 추가 후 Outlet으로 연결
1번부터 2번까지 과정이 얼핏 보면 문제가 없어 보인다.
근데 지극히 중요한 한가지를 간과한 것이 있다.
TableView는 셀을 반복적으로 재사용하는 특성이 있다는 점.
바로 이러한 특성 때문에 테이블뷰 안에 추가한 요소를 IBOutlet으로 직접 연결하는 것은 잘못된 방법이다.
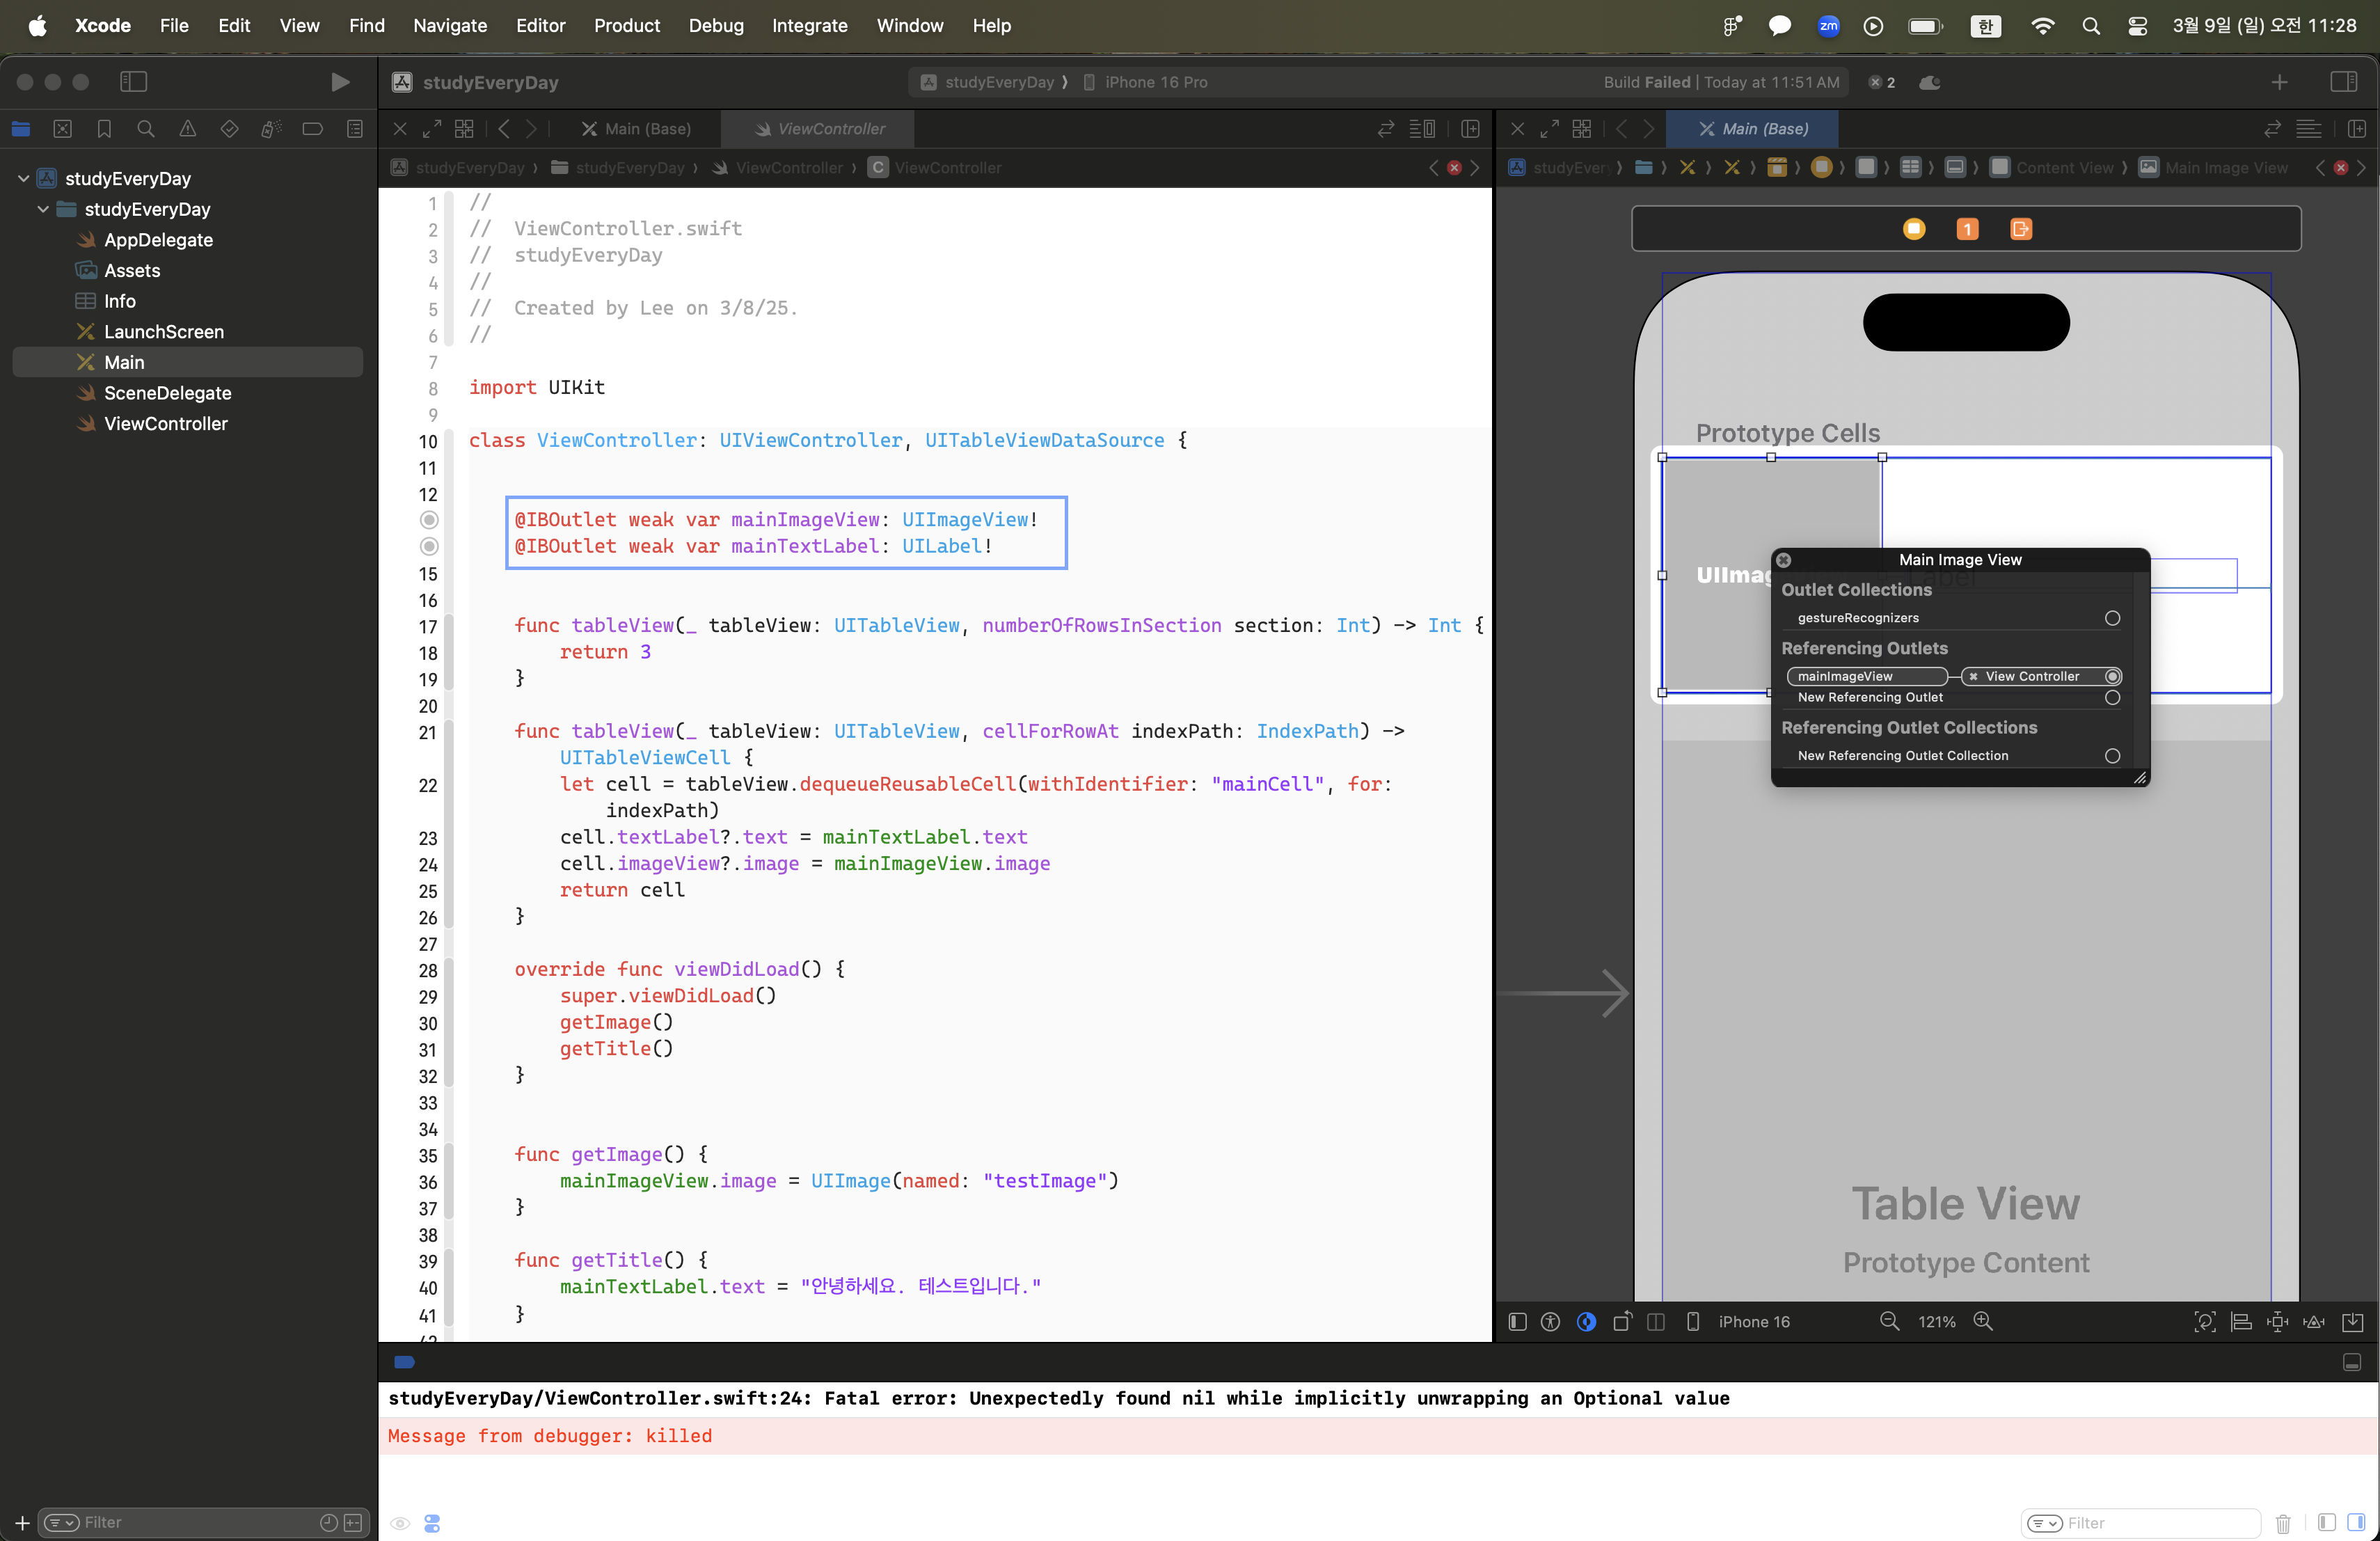
이를 간과하고 하단의 코드를 작성했다.
class ViewController: UIViewController, UITableViewDataSource {


    @IBOutlet weak var mainImageView: UIImageView!
    @IBOutlet weak var mainTextLabel: UILabel!


    func tableView(_ tableView: UITableView, numberOfRowsInSection section: Int) -> Int {
        return 3
    }

    func tableView(_ tableView: UITableView, cellForRowAt indexPath: IndexPath) -> UITableViewCell {
        let cell = tableView.dequeueReusableCell(withIdentifier: "mainCell", for: indexPath)
        cell.textLabel?.text = mainTextLabel.text
        cell.imageView?.image = mainImageView.image
        return cell
    }

    override func viewDidLoad() {
        super.viewDidLoad()
        getImage()
        getTitle()
    }

    // 이미지를 반영하는 코드
    func getImage() {
        mainImageView.image = UIImage(named: "testImage")
    }

    // Title을 반영하는 코드
    func getTitle() {
        mainTextLabel.text = "안녕하세요. 테스트입니다."
    }
}
나름 구조화를 위해 함수로 묶어서 작성했는데,
이는 사실 단순 뷰를 구현할 때 가능한 방식이고 TableView에는 적절한 방식이 아니었다.
결국, 다음과 같은 에러가 발생했다.
The mainImageView outlet from the ViewController to the UIImageView is invalid. Outlets cannot be connected to repeating content. [12]

이 에러는 TableView의 셀 안에 있는 UIImageView에 연결된 IBOutlet이 잘못 설정된 경우에 발생하는 에러다.
TableView 셀에 반복되는 콘텐츠를 IBOutlet으로 직접 연결하려고 했기 때문에 생기는 문제다.
따라서 문제를 해결하려면, 각 셀마다 동적 처리가 가능하도록 바꿔주어야 한다.
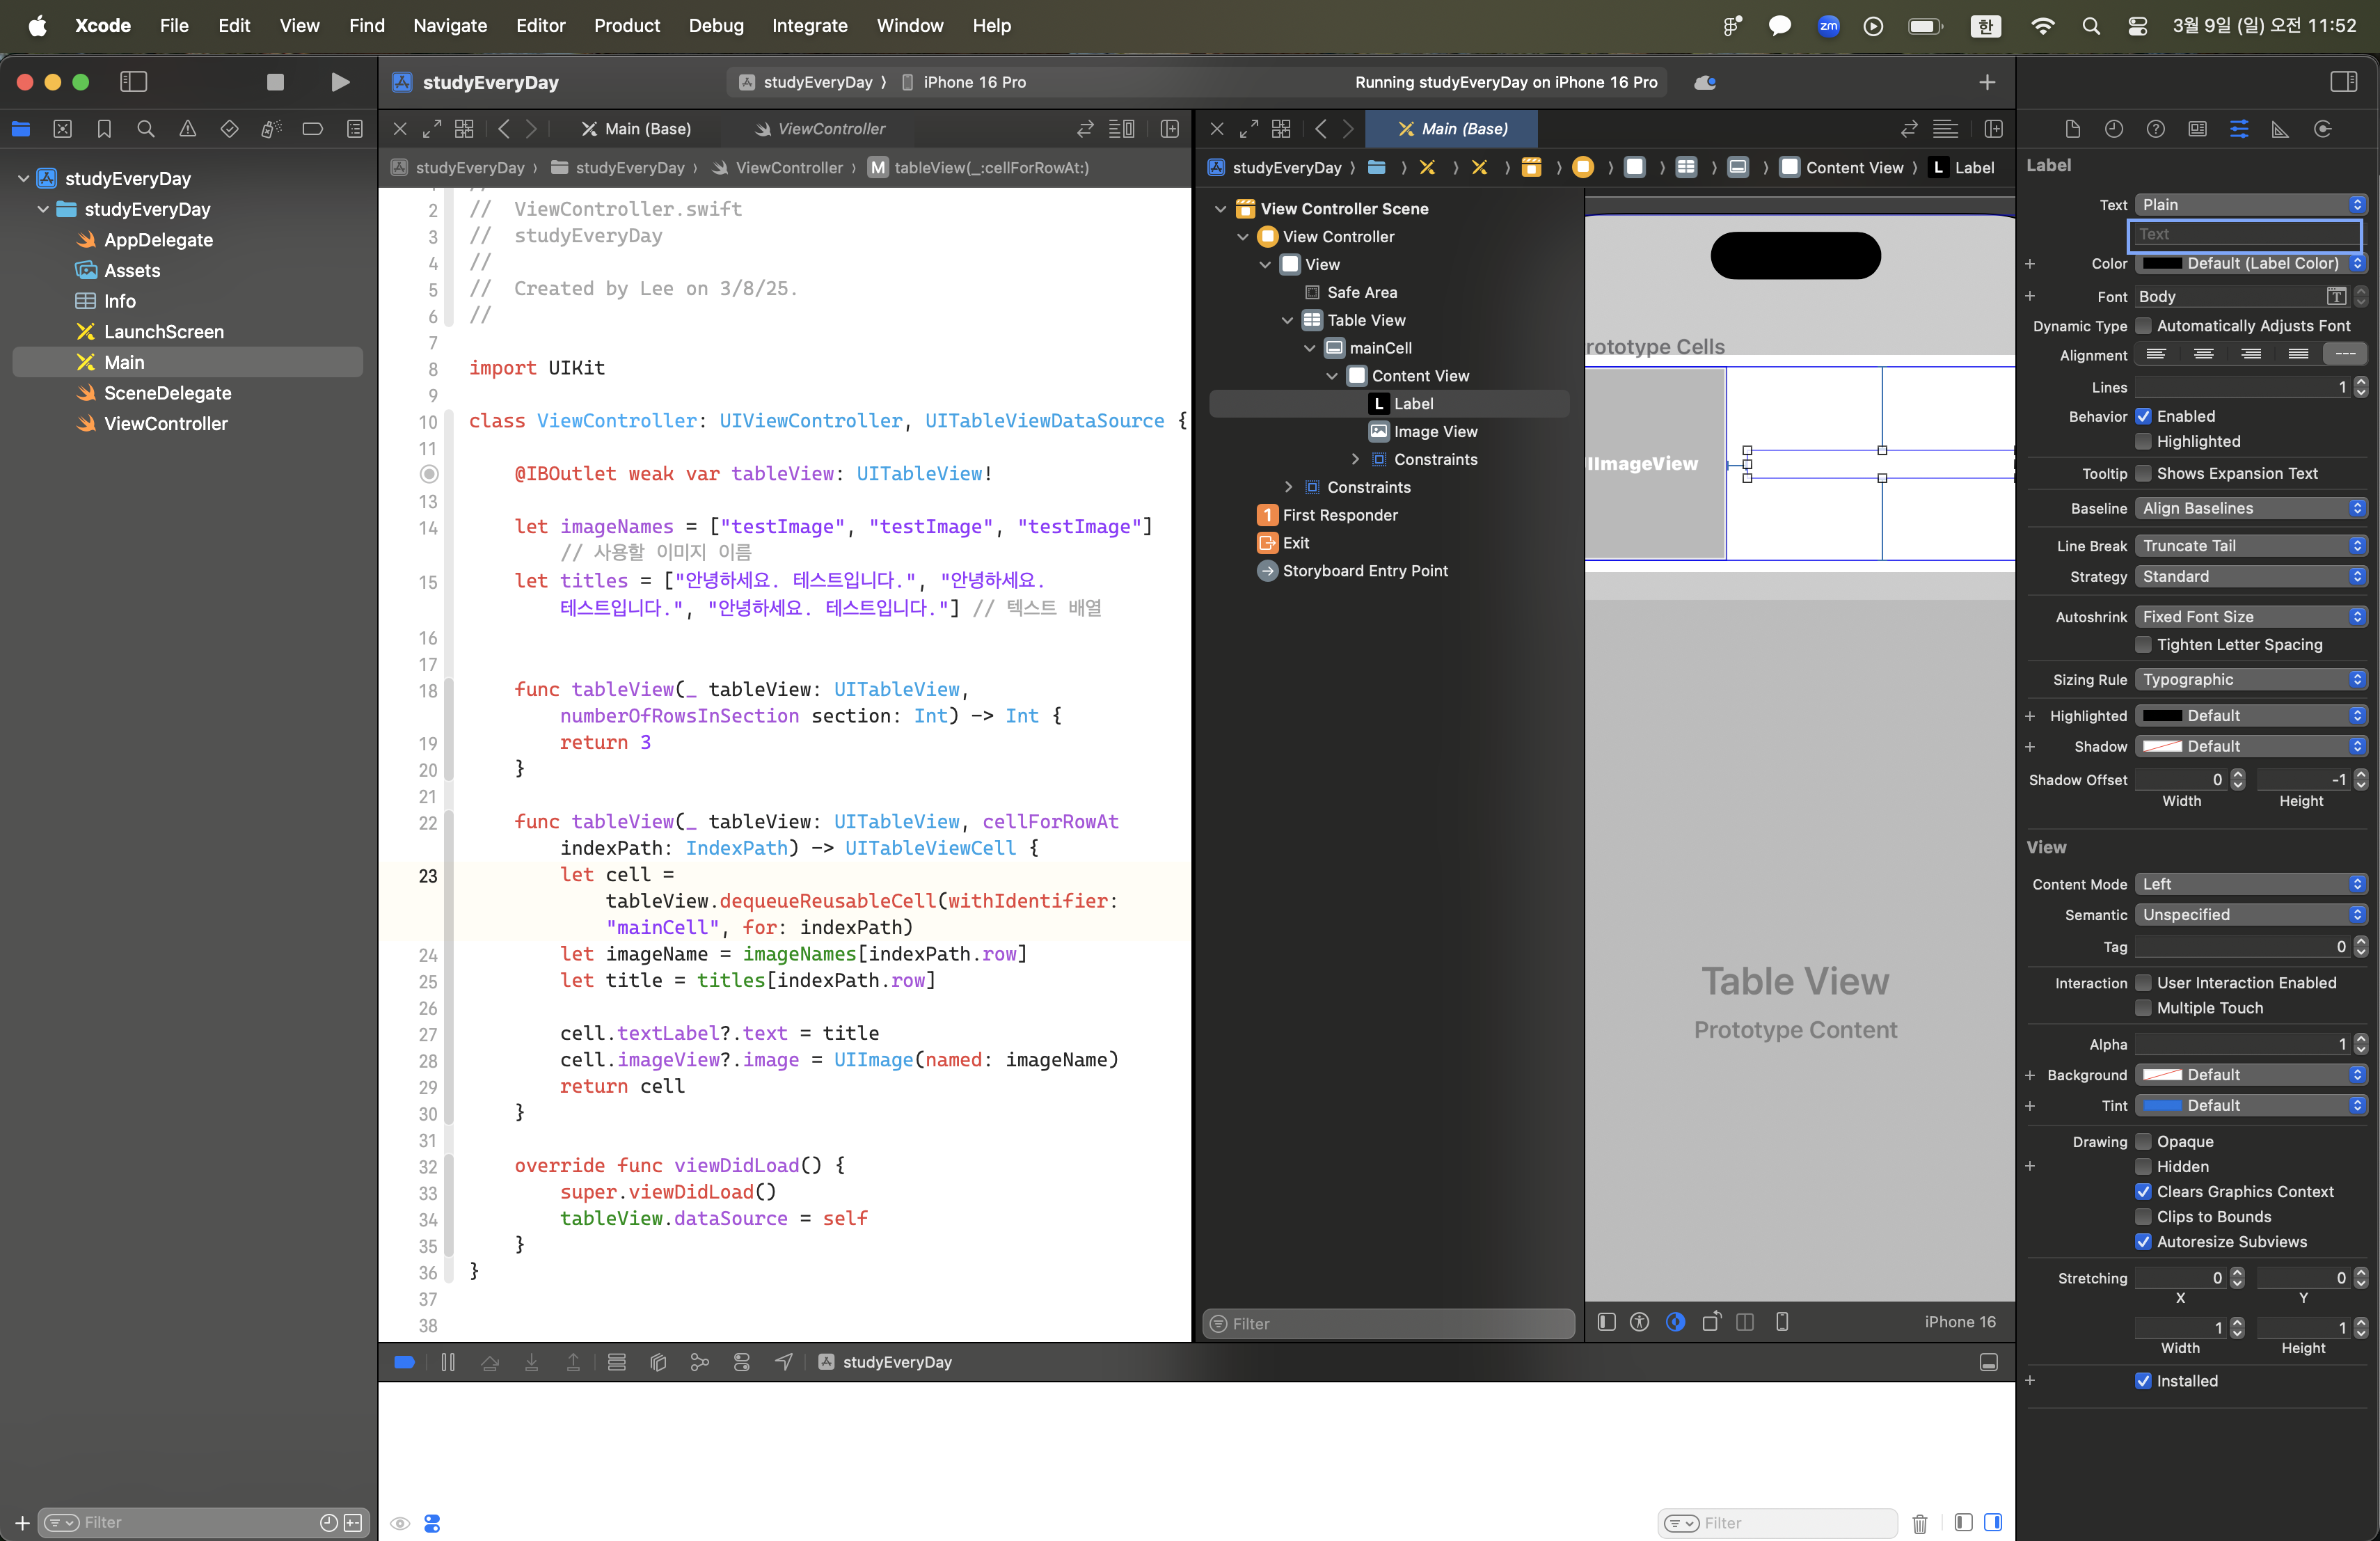
⎮ 오류 수정하기 : TableView 재적용
1. 요소(Label, ImageView)의 직접적인 연결을 삭제하고, TableView를 연결하기

2. 사용할 이름과 이미지 배열 추가
let imageNames = ["testImage", "testImage", "testImage"] // 사용할 이미지 이름
let titles = ["안녕하세요. 테스트입니다.", "안녕하세요. 테스트입니다.", "안녕하세요. 테스트입니다."] // 텍스트 배열
3. viewDidLoad() 수정
    override func viewDidLoad() {
        super.viewDidLoad()
        tableView.dataSource = self
    }


    /*
    viewDidLoad에서 tableView의 dataSource를 설정하여
    TableView가 데이터를 잘 제공할 수 있도록 설정
    */
4. tableView cellForRowAt 수정
    func tableView(_ tableView: UITableView, cellForRowAt indexPath: IndexPath) -> UITableViewCell {
        let cell = tableView.dequeueReusableCell(withIdentifier: "mainCell", for: indexPath)
        let imageName = imageNames[indexPath.row]
        let title = titles[indexPath.row]

        cell.textLabel?.text = title
        cell.imageView?.image = UIImage(named: imageName)
        return cell
    }
5. 빌드 결과

⎮ 오류 수정하기 : 기본 텍스트 숨기기
가장 간단하게 해결하는 방법은 StoryBoard에서 텍스트에 작성된 Label을 지우는 방식이다.
⎮ 최종 샘플
다음과 같은 TableView가 완성되었다.

단, TableView 특성상 Row 사이의 여백이 없이 선택이 된다.
TableView에서 Row 사이의 여백을 만드려면 어떻게 해야할까?
⎮ TableView에서 Row 사이의 여백 만들기
Swift | TableView에서 Row 사이의 여백 만들기
TableView에서 Row 사이의 여백 만들기⎮ 일반적인 TableView TableView는 하단의 사진과 같이 Row 사이의 간격이 없다. 어떻게 하면 TableView의 Row 사이의 간격을 추가할 수 있을까? 바로 UIView를 활
uddt.tistory.com
'Swift > 오류 개발자' 카테고리의 다른 글
| Swift | SnapKit no such file or directory 오류 (2) | 2025.03.18 |
|---|---|
| Swift | TableView에서 특정 영역만 선택이 가능하도록 만들기 (0) | 2025.03.09 |
| Swift | TableView에서 Row 사이의 여백 만들기 (0) | 2025.03.09 |
| Swift | Text Label에 2줄로 입력이 안되는 문제 해결하기 (0) | 2025.03.07 |
| Swift | UIButton의 속성이 적용이 안되는 문제 해결하기 (0) | 2025.03.06 |


